Wondering if you can actually grow fiery chili peppers inside, away from the unpredictable whims of nature? Absolutely! Cultivating chilies indoors is not only possible, but it's also a rewarding journey that brings vibrant color and intense flavor right into your home.
Growing chilies indoors allows you to control the environment, extending the growing season and shielding your precious plants from pests and harsh weather. Whether you're an apartment dweller with limited space or simply want to enjoy fresh chilies year-round, indoor chili gardening offers a practical and satisfying solution. You'll have complete command over temperature, humidity, and lighting – the key ingredients for a successful harvest. So, grab your pots, seeds, and let's dive into the exciting world of growing peppers indoors, transforming your windowsill into a miniature chili farm!
Getting Started: Essential Supplies for Indoor Chili Gardening
Before you even think about planting, you'll need to gather a few essential supplies to set the stage for success. Think of it as preparing your indoor garden for its starring role!
Chili Seeds: Opt for varieties known to thrive indoors. Smaller chili types like Thai peppers, habaneros, or ornamental varieties are often ideal for container gardening. Pots: Choose pots with drainage holes. Size matters! Start with smaller pots (4-6 inches) for seedlings and transplant to larger ones (8-12 inches) as the plants grow. Terracotta or plastic pots work well. Potting Mix: Use a well-draining potting mix formulated for containers. Avoid garden soil, which can become compacted and hinder drainage. A mix containing peat moss, perlite, and vermiculite is a good choice. Grow Lights (Highly Recommended): Natural sunlight might not be sufficient, especially during winter months. Invest in LED grow lights specifically designed for plants. Watering Can or Spray Bottle: For gentle and controlled watering. Fertilizer: A balanced liquid fertilizer formulated for fruiting plants. Small Gardening Tools:A trowel for transplanting, pruners for trimming, and plant labels to keep track of varieties.
Planting Your Chili Seeds: From Seedling to Sprout
The magic begins with planting. Here's a step-by-step guide to get your chili seeds off to a strong start:
1.Soaking (Optional): Soak chili seeds in warm water for 12-24 hours before planting to improve germination rates.
2.Sowing: Fill your small pots with potting mix, leaving about an inch of space at the top. Sow 2-3 seeds per pot, about ¼ inch deep.
3.Watering: Gently water the soil until it’s evenly moist but not soggy.
4.Warmth: Chili seeds need warmth to germinate. Maintain a soil temperature of 75-85°F (24-29°C). A heat mat can be beneficial.
5.Light: Once the seedlings emerge (usually within 1-3 weeks), provide them with plenty of light. If using grow lights, position them a few inches above the seedlings.
6.Thinning: Once the seedlings have developed a few sets of true leaves, thin them to one strong seedling per pot by snipping off the weaker ones at soil level.
Indoor Care Routine: Nurturing Your Chili Plants to Fruition
Consistent care is key to a bountiful harvest of indoor-grown chilies.
Lighting: The Sunshine Substitute
Duration: Aim for 14-16 hours of light per day during the vegetative stage and 12-14 hours during the flowering and fruiting stages. Intensity: The intensity of the light is crucial. LED grow lights specifically designed for plants are your best bet. Position them close enough to the plants to provide adequate light, but not so close that they cause scorching. Types of Grow Lights:LED grow lights are energy-efficient and provide the full spectrum of light that chili plants need. Fluorescent grow lights are another option, but they are less energy-efficient and may not provide the same intensity.
Watering: Finding the Right Balance
Frequency: Water your chili plants when the top inch of soil feels dry to the touch. Overwatering can lead to root rot, while underwatering can stress the plants. Method: Water deeply and thoroughly, ensuring that the water drains out of the drainage holes. Avoid getting water on the leaves, as this can promote fungal diseases. Water Quality:Use room-temperature water. Avoid using tap water that is heavily chlorinated or fluoridated.
Fertilizing: Fueling Growth and Fruiting
Type: Use a balanced liquid fertilizer (e.g., 20-20-20) during the vegetative stage. Once the plants start flowering, switch to a fertilizer with a higher phosphorus content (e.g., 10-30-20) to promote fruit production. Frequency: Fertilize every 2-3 weeks, following the instructions on the fertilizer label. Avoid over-fertilizing, which can burn the roots.
Temperature and Humidity: Creating a Comfortable Environment
Temperature: Maintain a daytime temperature of 70-80°F (21-27°C) and a nighttime temperature of 60-70°F (16-21°C). Humidity: Chili plants prefer a humidity level of 40-60%. You can increase humidity by placing a tray of water near the plants, using a humidifier, or misting the plants regularly.
Pollination Indoors: Encouraging Fruit Set
Indoor chili plants may require assistance with pollination, as there are no bees or other pollinators to do the job.
Hand-Pollination: Use a small paintbrush or cotton swab to transfer pollen from the stamen (male part) to the pistil (female part) of each flower. Do this in the morning, when the pollen is most viable. Shake the Plants: Gently shake the plants to release pollen.
Troubleshooting Common Issues in Apartment Chili Growing
Even with the best care, you might encounter some challenges. Here's how to tackle common problems: Aphids: These tiny pests suck sap from the plants. Wash them off with a strong stream of water or use insecticidal soap. Spider Mites: These pests create webs on the plants and cause the leaves to become discolored. Treat them with insecticidal soap or neem oil. Whiteflies: These small, white flies suck sap from the plants. Use yellow sticky traps to catch them or treat them with insecticidal soap. Blossom End Rot: This condition causes the bottom of the chili peppers to rot. It's caused by a calcium deficiency. Ensure your potting mix is well-draining and supplement with calcium if needed. Leaf Drop:Leaf drop can be caused by a variety of factors, including overwatering, underwatering, temperature stress, or pest infestations. Identify the cause and address it accordingly.
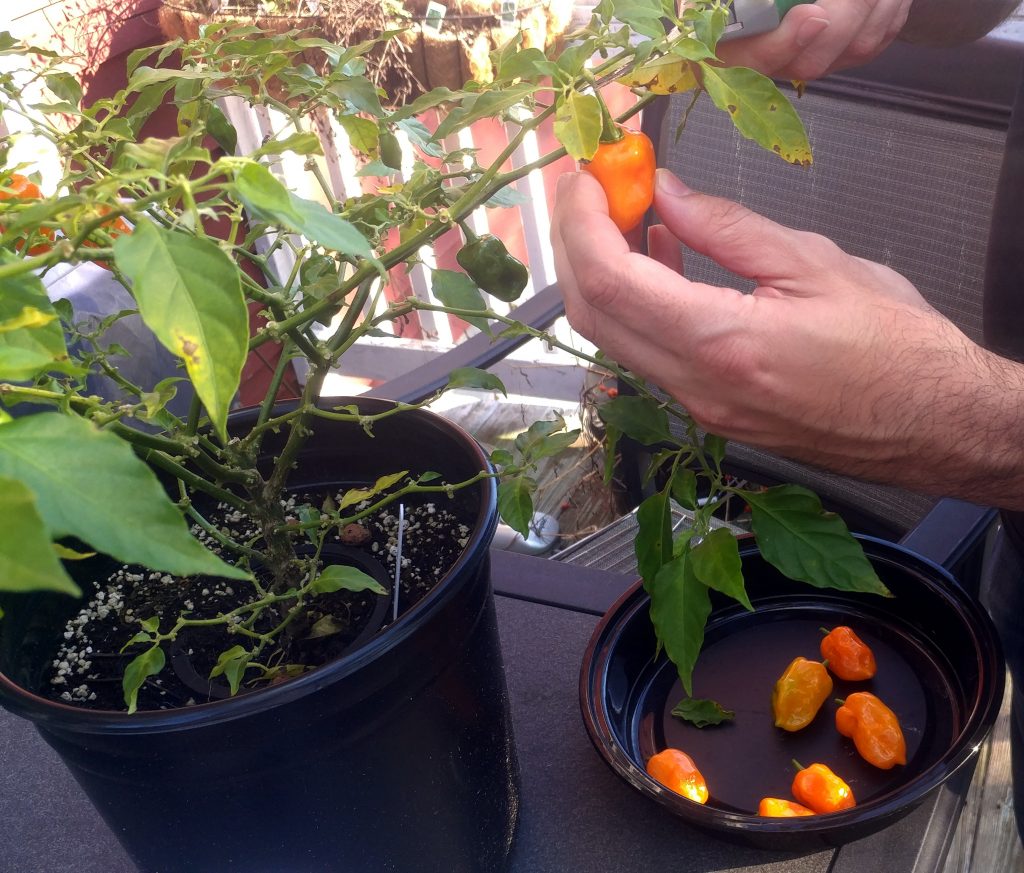
Harvesting and Enjoying Your Homegrown Chilies
The moment you've been waiting for! Chilies are typically ready to harvest when they reach their mature color and size.
Harvesting: Use pruners or scissors to cut the chilies from the plant, leaving a small stem attached. Storage: Fresh chilies can be stored in the refrigerator for up to a week. You can also dry them, freeze them, or pickle them for longer storage. Enjoying:Add your homegrown chilies to your favorite dishes for a burst of flavor and heat!
Can I grow chili peppers indoors year-round?
Yes, with the right conditions (grow lights, temperature control), you can absolutely grow chili peppers indoors year-round. It gives you the advantage of continuous harvests!
What are the best chili pepper varieties for indoor growing?
Smaller varieties like Thai peppers, habaneros, jalapenos, and ornamental peppers tend to do well in containers indoors. Look for compact or dwarf varieties.
How often should I water my indoor chili plants?
Water when the top inch of soil feels dry. Avoid overwatering, which can lead to root rot. Frequency will depend on the humidity, temperature and pot size.
Embarking on your own indoor chili growing journey is a fantastic way to bring the spice and satisfaction of gardening into your home, no matter the season or your outdoor space. Embrace the learning process, experiment with different varieties, and enjoy the rewarding experience of harvesting your very own homegrown chilies! With a little patience and care, you'll be well on your way to becoming an indoor chili gardening expert.

Post a Comment